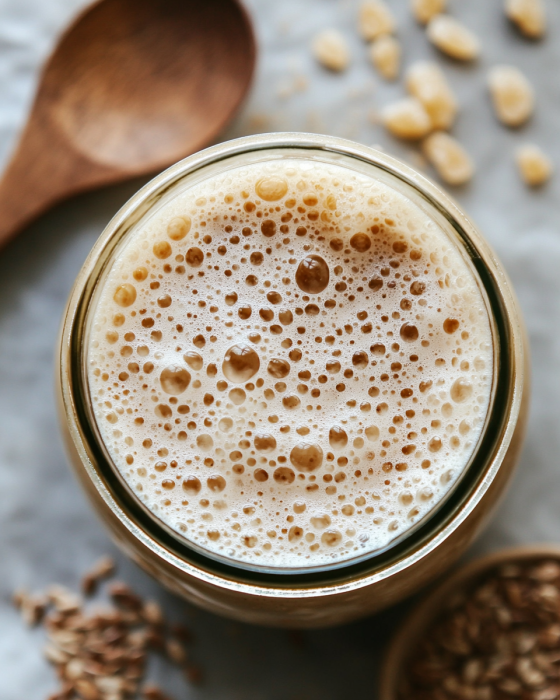
Sourdough Starter
There’s something truly magical about the tangy aroma and rustic flavor of homemade sourdough bread, and it all begins with a sourdough starter. This simple yet essential component is what gives your bread that distinctive flavor and texture we all love. The best part? Making your own starter is not only rewarding, but it also lets you customize the flavor profile of your bread. While it requires a bit of patience, trust me, the results are absolutely worth it! Let’s dive into the process of creating a sourdough starter from scratch, using just a few basic ingredients.
Why You’ll Love This Recipe
Creating a sourdough starter from scratch is such a fun and satisfying journey! I adore how it gives me complete control over the flavor of my bread right from the start. The fermentation process introduces natural yeasts and bacteria, which are key to developing that signature sourdough taste. Once my starter is active, it opens the door to a world of sourdough recipes—from classic loaves to pizza dough and even pancakes! Plus, watching a simple flour-and-water mixture transform into something alive with flavor is nothing short of fascinating.
Ingredients
- 1 cup all-purpose flour
- 1/2 cup lukewarm water
Directions
1. Mix Flour and Water:
I start by combining 1 cup of all-purpose flour with 1/2 cup of lukewarm water in a clean glass or plastic container. I stir it all together until there are no lumps and everything is thoroughly combined.
2. Cover and Rest:
Next, I cover the container loosely with a clean kitchen towel or plastic wrap to allow for airflow. Then, I place it in a cozy spot in my kitchen, away from direct sunlight.
3. Allow Fermentation:
I let the mixture sit at room temperature for about 24 hours. During this time, natural fermentation begins, and I may start to see bubbles forming on the surface—exciting!
4. Discard and Feed:
After 24 hours, it’s time to feed my starter. I discard half of the mixture to regulate acidity and yeast activity, then add 1/2 cup of all-purpose flour and 1/4 cup of lukewarm water to what’s left. I stir it all together until well combined.
5. Repeat Feeding Routine:
I cover the container again and let it rest at room temperature for another 24 hours. I continue this feeding routine daily, discarding half of the mixture and replenishing it with equal parts flour and water until the starter becomes bubbly and active.
6. Patience is Key:
Typically, it takes about 5-7 days for the sourdough starter to fully develop and become active. I stay patient and consistent with my feeding routine, and soon enough, I’ll have a vibrant and flavorful starter ready for all my sourdough baking adventures.
Servings and Timing
- Prep Time: 5 minutes
- Cook Time: 0 minutes
- Total Time: 5-7 days (for fermentation)
- Serving Size: 1 active sourdough starter
Variations
While this sourdough starter recipe is straightforward and effective, here are a few variations to consider:
- Whole Wheat Flour Starter: Substitute whole wheat flour for all-purpose flour to create a heartier flavor. Whole wheat flour adds more nutrients and can help speed up fermentation.
- Rye Flour Starter: Using rye flour can yield a starter with a distinct earthy flavor and may ferment more quickly due to its higher nutrient content.
- Water Temperature: Lukewarm water is essential for activating the natural yeast. If the water is too hot or too cold, it can hinder fermentation, so I always aim for warm but not hot.
Storage and Maintenance
Once my sourdough starter is fully developed, I store it in the fridge to slow down fermentation. If I’m not using it right away, I feed it once a week to keep it active. Before using it in a recipe, I take it out of the fridge, let it come to room temperature, and feed it once or twice to revive it. If I need a larger amount, I can easily increase the quantities of flour and water during the feeding process.
FAQs
How do I know when my sourdough starter is ready?
I know my starter is ready when it has doubled in size within 4-6 hours of feeding and has visible bubbles throughout. It should also have a pleasant, slightly tangy aroma.
Can I use cold water to make my starter?
I recommend using lukewarm water because it activates the natural yeasts more effectively. Cold water can slow down fermentation, making it take longer for the starter to develop.
How do I maintain my sourdough starter?
I maintain my starter by regularly feeding it with equal parts flour and water. If it’s stored in the fridge, I feed it about once a week. If it’s kept at room temperature, I feed it daily.
What should I do if my sourdough starter isn’t bubbling?
If my starter isn’t bubbling, it could be due to low temperatures or cold water. I make sure it’s in a warm spot and give it more time. If it’s been over a week with no progress, I might try starting fresh with new flour and water.
Can I use whole wheat or rye flour for my starter?
Absolutely! Whole wheat or rye flour can be used for my starter. These flours provide more nutrients for fermentation and can give the starter a slightly different flavor profile. Just be aware that I may need to adjust the feeding schedule based on the flour used.
Conclusion
Making a sourdough starter from scratch is an enjoyable and rewarding process. The key is patience and consistency. Once I’ve nurtured my starter through the fermentation process and it’s bubbly and active, I’m ready to bake delicious sourdough bread or incorporate it into a variety of other recipes. With a little time and care, I’ll have a vibrant starter full of flavor, ready to become the foundation of all my sourdough creations! 🍞✨